
You’ll find the procedures share the same goal — replace missing teeth with stable implants — but they differ where it matters: bone quality, anatomy, and aesthetic demands shape the plan for each arch. Upper-arch cases often need sinus checks and extra support because the bone is softer, while lower-arch cases usually benefit from denser bone and greater initial stability — both of which your cosmetic dentist in Evansville IN will evaluate before recommending a treatment plan.
Expect the article to walk you through how anatomy changes surgical choices, why implant techniques and timelines vary, and how prosthetic design adapts to function and appearance so you can understand which factors affect your treatment.
Anatomical Differences Between Upper and Lower Jaw
You will encounter clear differences in bone quality, the proximity of key anatomical structures, and the overall arch shape. These differences directly affect implant number, position, and surgical approach.
Bone Density and Quality
The maxilla (upper jaw) typically has thinner, more cancellous bone compared with the mandible (lower jaw), which usually has denser cortical bone. That softer upper bone provides less primary stability for implants, so you may need more implants, wider-diameter fixtures, or bone grafting to achieve predictable anchorage.
Bone volume also varies vertically and horizontally. The lower jaw often retains more bone height and width after tooth loss, allowing standard implant lengths and simpler placement. In contrast, the upper jaw commonly shows faster resorption of the alveolar ridge, especially in the posterior maxilla, which can necessitate sinus lifts or staged grafts before implant placement.
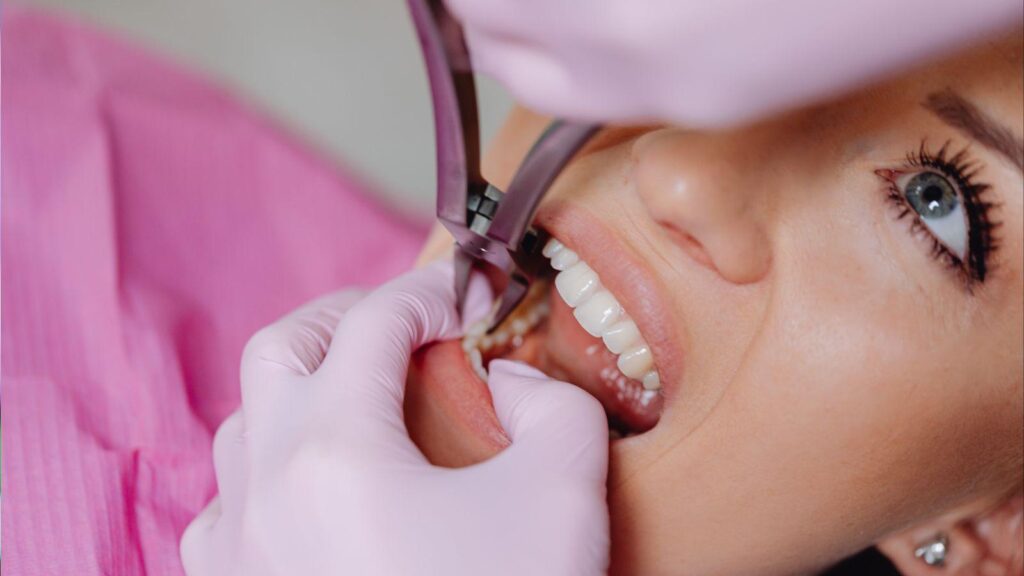
Your clinician will assess bone quality with CBCT scans and use that data to choose implant type, torque targets, and loading protocols. Good planning reduces failure risk and improves long-term stability.
Sinus and Nerve Proximity
In the posterior maxilla, the floor of the maxillary sinus frequently lies close to the planned implant sites. You may require a sinus lift or use of short or angled implants to avoid sinus penetration while maintaining adequate bone contact. Failure to address limited vertical height increases the risk of sinus complications and implant loss.
In the mandible, the inferior alveolar nerve runs within the mandibular canal and defines a safe vertical zone for implant placement. Your surgeon must respect this nerve location on 3D imaging to avoid numbness or paresthesia. Mental foramen position near premolar sites also influences implant angulation and depth.
Precise imaging and surgical guides mitigate these risks, enabling predictable placement while protecting sinus and nerve structures.
Arch Shape and Size
The maxillary arch tends to be wider and more U-shaped, while the mandibular arch is narrower and more parabolic. These shape differences affect prosthetic design, occlusal spacing, and implant distribution for full-arch restorations. You may need different implant spread and angulation to achieve even support and proper emergence profiles.
Arch size also determines cantilever length and number of implants needed. A larger upper arch may require additional implants or cross-arch stabilization to control flex and maintain esthetics. In the lower arch, closer implant spacing often provides sufficient support but must respect anatomical constraints like bone volume and the mandibular symphysis.
When planning, your prosthodontist will map implant positions to match the arch form and functional load, ensuring the prosthesis fits your soft tissue contours and chewing dynamics.
Implant Techniques and Treatment Protocols
Upper-arch and lower-arch implant work differs mainly in bone quality, sinus and nerve anatomy, and prosthetic design. You’ll encounter different surgical steps, grafting needs, and healing timelines that influence chair time, cost, and interim tooth options.
Surgical Approaches
For the upper arch, you’ll often face softer, less dense maxillary bone and the proximity of the maxillary sinuses. Surgeons commonly place implants with angled distal implants (All-on-4 concept) or use vertical short implants to avoid sinus penetration. If sinus floor elevation is required, it adds an extra procedure and modifies implant angulation and length choices.
In the lower arch, the mandible typically offers denser cortical bone but has the inferior alveolar nerve to avoid. You’ll see more straightforward vertical implant placement and, when bone height is limited posteriorly, use of shorter implants or lateral nerve repositioning in rare cases. Surgical guides and CBCT planning reduce risk and improve implant parallelism in both arches.
Grafting Requirements
You’ll need grafting more often in the upper arch because posterior maxilla resorption and sinus pneumatization reduce vertical bone height. Common options include lateral window or crestal sinus lifts with autograft, xenograft, or allograft materials, and use of collagen membranes to stabilize the graft. Ridge augmentation may also be required for horizontal deficiency when placing a full-arch screw-retained prosthesis.
In the lower arch, grafting frequency is lower but still necessary for thin ridges or large extraction defects. Block grafts or particulate grafts with membranes restore width. When you plan implant placement near the mental foramen or in an atrophic mandible, onlay grafting or guided bone regeneration helps achieve implant stability and proper emergence profile for the final prosthesis.
Healing Timeframes
Your healing timeline depends on bone quality and whether you had grafting or sinus lift procedures. With good native bone, osseointegration in the mandible often proceeds faster; clinicians commonly allow 3–4 months before loading full-arch prostheses. The maxilla, with its softer bone, typically requires 4–6 months for predictable integration.
If you undergo sinus augmentation or extensive ridge grafting, expect 6–9 months before final implant placement or loading. Immediate loading protocols (same-day provisional prosthesis) are possible when primary stability exceeds ~35 Ncm and distribution of implants supports occlusal forces; you should still plan for a protected, soft diet and staged occlusal adjustments during the first 3 months.
Prosthetic Considerations for Upper and Lower Implants
You should expect differences in prosthetic design, soft-tissue integration, and load management between the maxillary and mandibular arches. These differences affect choices for retention systems, aesthetic strategies, and how occlusal forces get distributed.
Retention and Stability
Upper-arch prostheses often need more implants or auxiliary support because maxillary bone is typically softer and less dense. You may receive 6–8 implants for a fixed bridge or use additional grafting to improve primary stability if you want a screw-retained fixed solution. Removable overdentures for the upper arch usually require more retention features (e.g., bar attachments or more locator housings) compared with the lower arch.
Lower-arch restorations generally achieve better immediate stability with 4–6 implants due to denser mandibular bone. You can often use fewer implants with predictable long-term retention, and locator-style attachments work well for overdentures. For fixed full-arch prostheses in the mandible, you can rely on cantilever limits and narrower implant-to-implant spans when planning implant positions.
Aesthetic Outcomes
The maxilla sits in the aesthetic zone, so you must prioritize soft-tissue contours, papilla recreation, and tooth display. Prosthetic emergence profiles, prosthesis flange design, and pink porcelain or composite must integrate with lip support and smile line. You will often need provisional restorations and staged tissue shaping to achieve natural-looking gingival architecture.
In the mandible, aesthetics are important but typically less demanding. You should focus on functional tooth form and stable occlusal contacts more than dramatic gingival reconstruction. When recession or thin biotype is present, use prosthetic contours and material selection (e.g., zirconia frameworks, layered ceramics) to mask metallic tones and create natural tooth color without excessive bulk.
Bite Force Distribution
Bite forces are higher in the mandible and concentrate on posterior implants; you need to manage occlusal schemes accordingly. You should design occlusion to reduce lateral loads—use mutually protected occlusion or group function depending on implant positions—and limit cantilevers to minimize torque on distal implants.
In the maxilla, lower bone density requires wider implant distribution and fewer long cantilevers to spread forces across multiple fixtures. You should consider splinting implants with a rigid framework to distribute loads evenly and select prosthetic materials that absorb or distribute stress (e.g., metal-acrylic for provisional, monolithic zirconia for definitive).